Bird Photography in Uganda: Beginner’s Guide
With more than 1,000 recorded bird species, Uganda is one of the richest birding destinations in Africa, and one of the friendliest for beginners. Colourful turacos, giant hornbills, shy forest specialists and the famously odd shoebill all live within a few days’ drive of each other. That makes bird photography in Uganda a wonderful way to build your skills while you travel.
Birds are also a challenge. They’re small, quick, easily spooked, and love hiding behind leaves. The good news is that a beginner with modest gear, a few key settings, and good field habits can come home with images they’re proud of. This guide covers equipment, camera settings, the best locations, target species, fieldcraft, ethics and trip planning.
Why Uganda Is Ideal for Beginner Bird Photographers
- Huge diversity in a small area. Forest, savannah, wetlands, lakes and mountains sit close together, so you can photograph very different species in a single trip.
- Endemics and specials. Uganda shares the Albertine Rift, home to many species found nowhere else, and is one of the few places you can reliably see the shoebill.
- Skilled local guides. Uganda’s birding guides know calls, habitats and territories, and they will often find birds long before you do.
- Accessible sites. Many top birding areas can be reached on established roads, with lodges and trails set up for visitors.
- Year-round birding. There is always something to see, with migrants adding extra variety between roughly November and April.
Choose the Right Gear
You don’t need a huge budget, but focal length matters more for birds than for almost any other subject.
Camera Body
Look for a camera with reliable continuous autofocus, a fast burst rate and decent high-ISO performance. Mirrorless and DSLR cameras both work well. Cropped-sensor (APS-C or Micro Four Thirds) cameras are popular with beginners because they effectively extend your reach.
#image_title
Lenses
- Telephoto zoom (100-400mm, 150-600mm or similar): the best all-round choice for birds.
- 300mm or 400mm prime: excellent if you already own one.
- Teleconverter: adds reach, though it reduces light and can slow autofocus.
- Mid-range zoom (70-200mm): useful for larger, approachable birds and for scenes with people or habitat.
Bridge cameras with long built-in zooms are also a sensible entry point, and are lighter to carry in the forest.
Accessories
- Bean bag or window clamp for photographing from a vehicle.
- Monopod for lightweight support on foot.
- Spare batteries and memory cards. Bird photographers shoot a lot of frames.
- Rain cover, lens cloth and silica gel for humidity and drizzle.
- Binoculars. They help you find and identify birds before you raise the camera.
- Neutral, muted clothing. Bright colours can startle birds.
Camera Settings for Beginners
Shoot in RAW
RAW files give you far more flexibility to recover shadows and highlights, especially in forests, where light changes quickly.
Prioritise Shutter Speed
Sharp bird photos come from freezing motion, and small birds move constantly.
- Perched birds: 1/800s or faster
- Active or hopping birds: 1/1000s to 1/1600s
- Birds in flight: 1/2000s or faster
- Large, slow birds (such as storks or a perched shoebill): 1/640s may be enough
Use Aperture Priority or Manual with Auto ISO
Set your aperture to around f/5.6 to f/8, choose a fast shutter speed, and let the ISO adjust. Don’t fear high ISO. Grain is easier to fix than blur.
Continuous Autofocus and Burst Mode
Use AF-C (or AI Servo) and shoot in short bursts. Many mirrorless cameras offer bird eye-detection autofocus, which is well worth enabling.
Focus on the Eye
A sharp eye makes a bird photo feel alive. Use a single focus point or eye-detection, and wait for a natural pose.
Watch the Exposure
Bright skies can underexpose dark birds, and white birds against dark foliage can lose detail. Check your histogram and use exposure compensation when needed.
Quick Reference
| Situation | Shutter speed | Aperture | ISO |
|---|---|---|---|
| Perched bird, good light | 1/800–1/1000 | f/5.6–f/8 | Auto (100–800) |
| Active small bird | 1/1250–1/2000 | f/5.6–f/8 | Auto (400–1600) |
| Bird in flight | 1/2000+ | f/5.6–f/8 | Auto |
| Forest understorey | 1/500–1/800 | Widest available | 1600–6400 |
| Waterbirds from a boat | 1/1000+ | f/5.6–f/8 | Auto |
Treat these as starting points and adapt to your conditions.
Best Places for Bird Photography in Uganda
#image_title
Mabamba Swamp
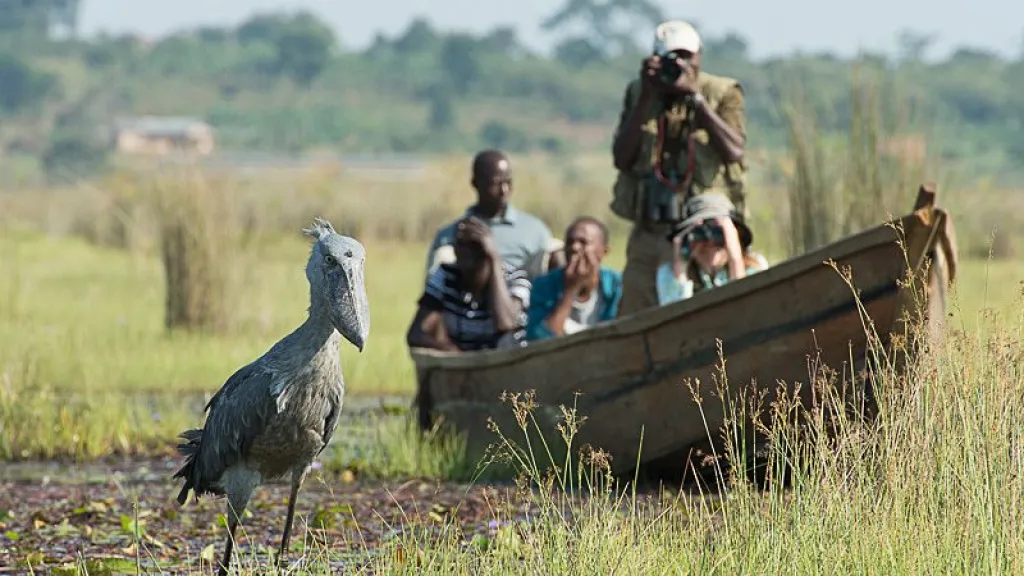
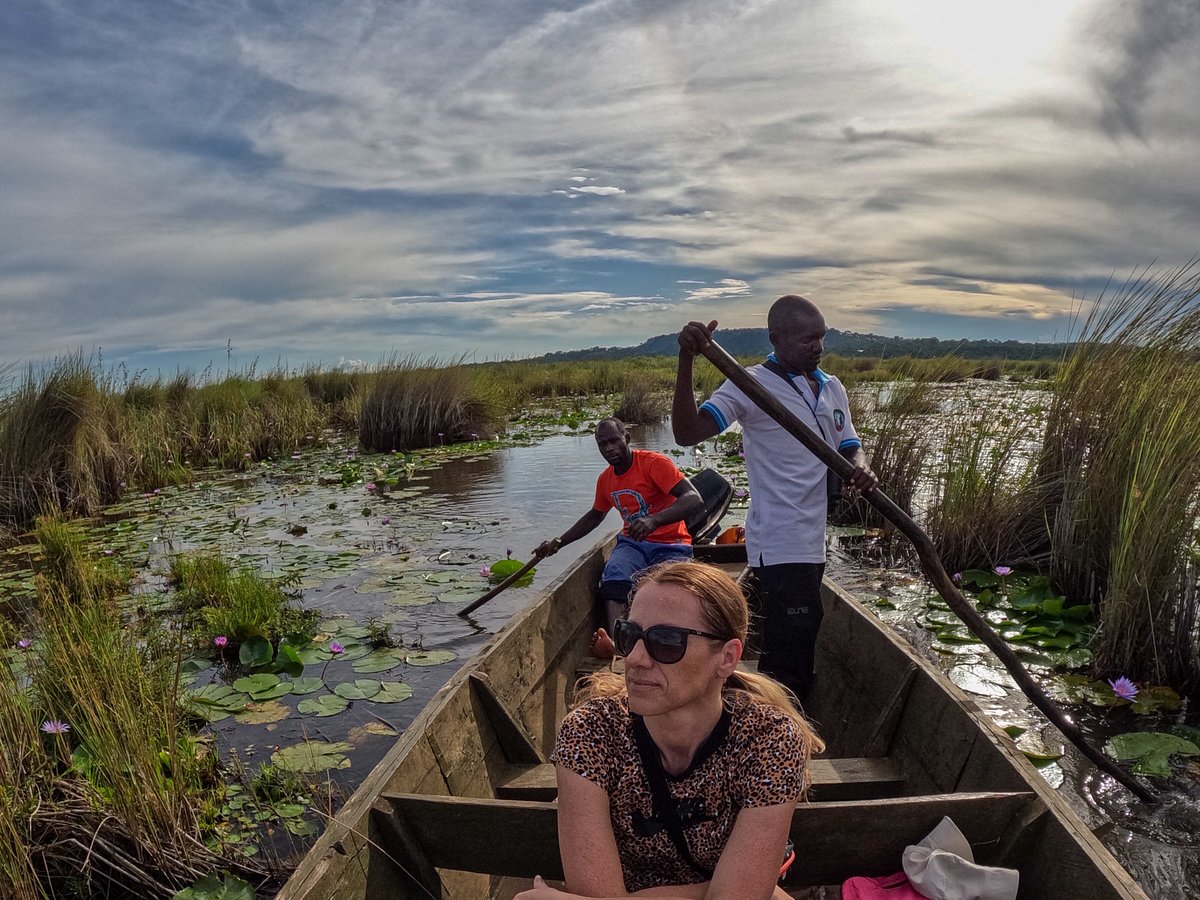
Mabamba Swamp, on the edge of Lake Victoria and reachable from Kampala and Entebbe, is the classic place to see the shoebill. Visitors travel in small canoes through papyrus channels, which puts you at a low, quiet, non-threatening angle. Sightings are not guaranteed, but early morning trips have a good record. Along the way, look for African jacana, purple swamphen, blue-breasted bee-eaters, and many kingfishers.
Queen Elizabeth National Park
The Kazinga Channel boat trip is a beginner’s dream, with close, relaxed waterbirds including pelicans, African fish eagles, kingfishers and herons. On land, the savannah and crater lakes add bee-eaters, hornbills, and raptors.
Murchison Falls National Park
The Nile delta and the river cruise below the falls are excellent for waterbirds, while the savannah and woodland offer species such as the Abyssinian ground hornbill and various raptors. The area is also a well-known place to look for shoebills, subject to conditions.
Bwindi Impenetrable National Park
Bwindi is a top destination for Albertine Rift endemics, many of them small, fast forest birds that are difficult to photograph. It’s rewarding but challenging, so consider it after you’ve built some experience. Birding around Buhoma and the Ruhija sector is popular.
Kibale Forest and Semuliki
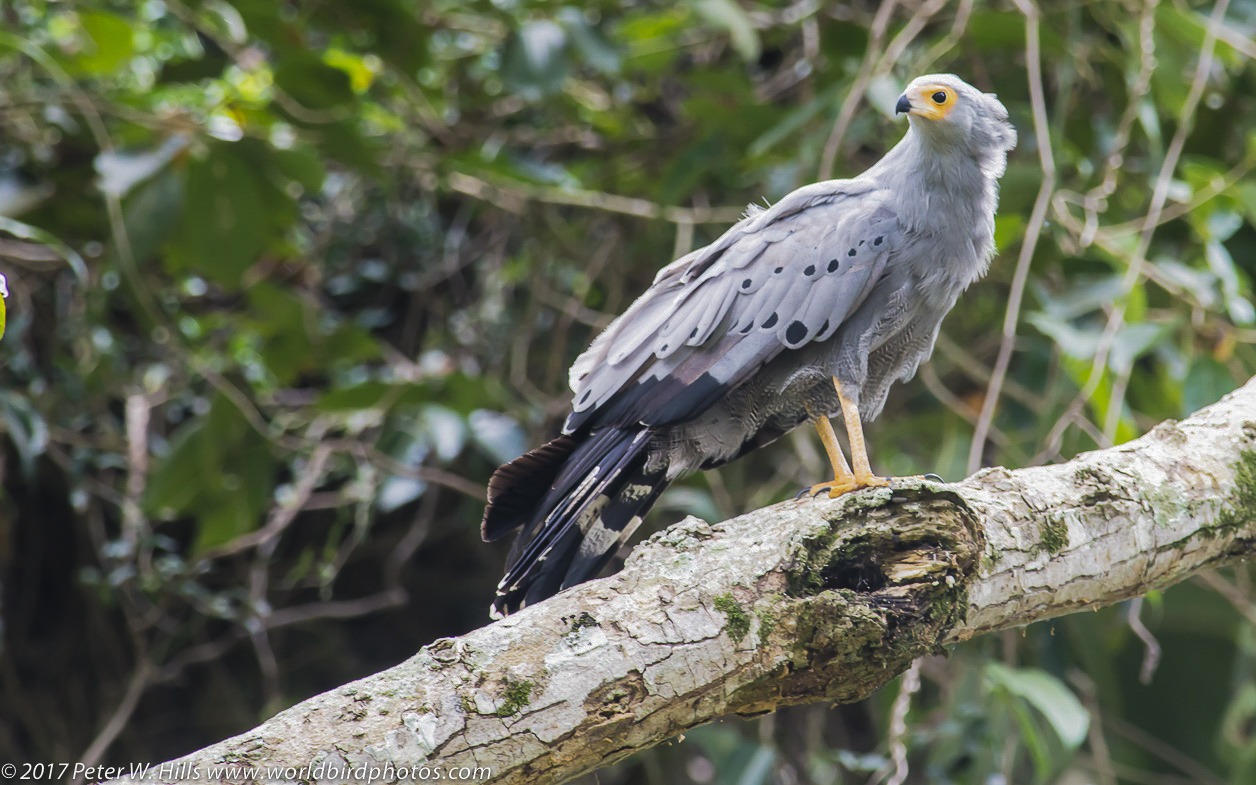
Kibale is known for chimpanzees but also for forest birds. Semuliki, near the Congo border, hosts Central African species that are hard to see elsewhere in Uganda, such as the Congo serpent eagle and several hornbills, along with other rarities.
Lake Mburo National Park
Lake Mburo is one of the easiest places for open-country and woodland birds, including the African grey hornbill, various barbets and the elegant crested crane on nearby wetlands. Its compact size and accessible tracks are useful for beginners.
Entebbe Botanical Gardens
Only a short distance from the airport, the gardens are an easy first stop or a last-day activity. You can find weavers, sunbirds, turacos and other common species in a relaxed setting.
Uganda’s National Bird
Keep an eye out for the grey crowned crane, Uganda’s national bird and one of the most photogenic species in the country.
Target Species Beginners Love
- Shoebill: prehistoric-looking and endlessly popular.
- Grey crowned crane: elegant, striking and relatively approachable.
- African fish eagle: dramatic, especially in flight over water.
- Great blue turaco: a huge, colourful forest bird found in areas like Bwindi and Kibale.
- Malachite and pied kingfishers: small jewels of the waterways.
- Carmine and blue-cheeked bee-eaters: bright, energetic and social.
- Hornbills: ground, black-and-white casqued and grey hornbills.
- Sunbirds: tiny, iridescent, often visiting flowering plants.
- Weavers: their nest-building behaviour makes lively subjects.
Fieldcraft: The Skill That Improves Every Shot
Technical settings only get you so far. Good bird photographers spend most of their time learning to approach and observe birds well.
Go early. Birds are most active in the first hours after sunrise, and the light is soft and warm.
Move slowly. Sudden movements alarm birds. Walk quietly, pause often, and let them get used to you.
Learn to listen. Calls often reveal a bird before you can see it. A local guide will help with this.
Watch behaviour. Birds tend to return to the same perches, feeding areas and nests. Anticipate their movements and be ready.
Work with the light. Keep the sun behind or beside you for even, colourful illumination. Backlighting can also produce beautiful glowing feathers if you expose carefully.
Be patient. A few minutes waiting often beats twenty minutes chasing.
Take your guide’s advice. They know where species live and how far you can approach without disturbing them.
Composition Tips
- Get eye-level with the bird. It creates a more intimate feeling.
- Separate the subject from the background. Choose your angle so branches and clutter don’t cross the bird.
- Leave space in the direction the bird faces or flies.
- Include some habitat. A kingfisher on a reed or a crane in a grassland tells a story.
- Capture behaviour. Feeding, preening, courting and flying are more dynamic than portraits alone.
- Fill the frame when you can, but keep some wider shots for context.
- Look for catchlights. A tiny reflection in the eye brings the bird to life.
Photographing Birds in Flight
This is difficult, so give yourself time to practise.
- Begin with larger, slower birds such as pelicans, storks and eagles.
- Use a fast shutter speed and continuous autofocus.
- Pan smoothly with the bird and keep following after pressing the shutter.
- Use burst mode and shoot before, during and after the peak moment.
- Shoot against clear skies where autofocus can lock on more easily.
Expect to delete plenty of frames, especially at the start. That’s normal.
Boat Safaris and Canoes
Boat trips are excellent for beginners because many waterbirds tolerate slow, quiet boats better than people on foot.
- Brace yourself against the boat for stability.
- Use a fast shutter speed to counter movement.
- Keep an eye on exposure, since reflections off water can mislead your meter.
- Protect your gear from spray.
- Stay seated and avoid sudden movements, especially in canoes.
Photographing from a Vehicle
Many birds around parks can be photographed from a vehicle, which acts as a moving hide.
- Rest your lens on a bean bag, not on the vehicle frame while the engine is running.
- Ask your driver to approach slowly and switch off the engine before you shoot.
- Position the vehicle so the light falls on the bird, not behind it.
- Avoid moving around inside, since vibration and noise can scare birds away.
Plan Your Trip for Better Bird Photos
Successful birding trips come from realistic planning.
Hire a local birding guide. For beginners, this is the best investment you can make. A good guide finds birds, identifies calls, and knows the best times and places.
Spend enough time in each location. Rushing between parks leaves little time for waiting and watching. Two nights is a sensible minimum for the main sites.
Start before dawn. The best birding often happens early, so plan breakfast and departures around it.
Think about transport. Birding locations are spread across Uganda, and many are reached by winding roads and dirt tracks. A comfortable 4×4 lets you stop when you spot something, adjust your schedule to the light, and reach places that are difficult with public transport. A local provider such as Uganda Car Rental Services can help you arrange a vehicle, with or without a driver, that suits your route and your equipment, so you can focus on the birds instead of the logistics.
Choose the season carefully. Drier months generally make roads easier and some sites more accessible, while the wetter months bring lush scenery and breeding activity. Migrants boost variety from roughly November to April.
Keep your itinerary flexible. A rare bird sighting or a good feeding frenzy may deserve an extra hour.
Protect Your Gear
- Humidity and rain: use rain covers and silica gel, and keep gear in a dry bag when not shooting.
- Dust: keep lenses covered on dirt roads and avoid changing lenses outdoors when possible.
- Battery life: carry spares and charge nightly.
- Backups: copy your photos each evening to a laptop or portable drive.
- Security: never leave equipment visible in a parked vehicle.
Ethics in Bird Photography
Bird photography should never harm the birds you’re photographing.
- Keep a respectful distance, especially near nests and roosts.
- Avoid flash. It can disturb and even harm birds, particularly nocturnal species.
- Don’t use playback of recorded calls to lure birds, especially in sensitive areas or breeding seasons. Some sites prohibit it, so follow your guide’s advice.
- Never bait or feed wild birds to draw them closer.
- Don’t disturb nests or trim vegetation for a better shot.
- Put the bird first. If it shows signs of stress, such as alarm calls, agitation, or leaving the nest, back away.
- Follow local rules and guides’ instructions. Some areas, like Mabamba Swamp, depend on careful visitor behaviour to protect the birds and the local communities.
Simple Editing Tips
- Crop for stronger composition, but try to get close in the field first.
- Adjust exposure, highlights and shadows gently.
- Sharpen lightly and reduce noise where necessary.
- Keep colours natural. Uganda’s birds are vivid enough without over-saturation.
- Delete blurry or near-duplicate frames, and keep your best.
Common Beginner Mistakes
- Shutter speed too slow. The most frequent cause of soft bird photos.
- Chasing birds. Approaching too fast scares them away.
- Ignoring the background. A busy background can ruin an otherwise good shot.
- Not researching species. Knowing what you might see, and where, saves time.
- Too much gear. Heavy kit becomes a burden on forest trails.
- Forgetting to enjoy the moment. Take time to watch and listen without the camera.
- Unrealistic expectations. Some birds, especially in forests, will stay hidden. Celebrate what you do see.
Frequently Asked Questions
What is the best lens for bird photography in Uganda?
A 100-400mm or 150-600mm telephoto zoom is the most popular choice, offering flexibility for perched birds, flight shots and waterbirds.
Do I need a professional camera?
No. A modern entry-level mirrorless or DSLR with a telephoto lens, or even a good bridge camera, will produce excellent images if you use it well.
Where can I see the shoebill?
Mabamba Swamp and parts of Murchison Falls National Park are commonly visited for shoebill sightings, but wild birds are never guaranteed, so allow flexibility in your schedule.
When is the best time for bird photography in Uganda?
Birds can be photographed year-round. Early mornings offer the best light and activity, and migrant species add variety between roughly November and April.
Should I hire a bird guide?
For beginners, yes. Guides dramatically improve your chances of finding and identifying species, and they know how to approach birds without disturbing them.
Can I use a tripod?
In forests and on foot, a tripod can be cumbersome. A monopod or bean bag is usually more practical.
Final Thoughts
Bird photography in Uganda is one of the most rewarding ways to experience the country. With a reliable telephoto lens, a fast shutter speed, patient fieldcraft, and a good local guide, even beginners can capture striking images of shoebills, turacos, kingfishers and dozens of other species.
Start with easier subjects, like waterbirds on a boat safari, then build up to the harder forest species as your confidence grows. Respect the birds, keep your plans flexible, and remember that some of the best moments happen when you lower the camera and simply watch.
Note: Park rules, site access, and seasonal conditions can change, so check current details with the Uganda Wildlife Authority, your guide, or your tour operator before your trip.
Planning a birding safari in Uganda and would love to travel in a 4×4 with driver- simply contact us now by sending an email to [email protected] or call us now on +256-700135510.